How to Slick Back Curly Hair (See the Results)
Want that clean, pulled-back look without flattening your curls or turning your head into a greasy helmet? You’re in the right place.
“Curly hair’s a blessing—until you try to slick it back. Here’s how to tame the bounce without killing the the style.”
We’re breaking down exactly how to slick back curly or wavy hair —the right way. No crust. No crunch. No chaos.
Hair Type Cheat Sheet for Curly Slick-Backs
Check our hair type classification chart if you don't know your type of hair type.
Hair Type |
What to Use |
Pro Tip |
|---|---|---|
2B–3A |
Cream + Clay Pomade, opens in a new tab |
Stretch roots with a round brush, keep ends curly. |
3B–3C |
Cream Only or Cream + Paste |
Finger-style for definition. Skip hard combs. |
4A–4C |
Leave-in + Edge Pomade |
Focus on edges and crown. Use scarf to set. |
🛒 Ready to Get the Look?
Grab The Wash, Glacial Hair Cream, and Glacial Clay Pomade, opens in a new tab to build your kit.
No flakes. No frizz. No fuss.
Step 1: Start With Clean Hair
This isn’t optional.
Curls already have their own texture and pattern—you don’t want to fight product buildup or greasy roots on top of that. Start with clean, towel-dried hair.
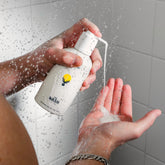
👉 Pro tip: Use The Wash —our sulfate-free, pH-balanced cleanser that detoxes without stripping your curls. Clean scalp. Clean canvas. Game on.
Step 2: Work Damp, Not Wet
Wet curls = stretch and break. Dry curls = hard to shape.
Damp is the sweet spot. Towel-dry gently and, if needed, use a diffuser or blow-dryer on low heat. Blow-drying with a round brush can help stretch out the roots while keeping your curl pattern intact through the ends.
Step 3: Section It Off
Slicking back curly hair? Work in sections —this is not a one-pass job.
Split your hair into 2 to 4 parts. Clip them up. Apply your styling product from root to end in each section to make sure no part is forgotten—especially those frizz-prone flyaways around the crown and sides.
Step 4: Pick the Right Product (or Combo)
Curly hair loves hydration. You want something that defines without flattening , holds without hardening.
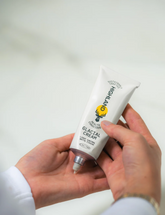
Start with a curl cream like our Glacial Hair Cream. It hydrates, controls frizz, and keeps your texture soft.
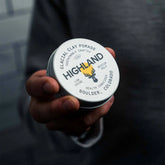
Lock it in with pomade if you need more hold our Glacial Clay Pomade gives a matte, clean finish that doesn’t weigh curls down.
Cream first, pomade after = control + definition.
Step 5: Apply with Intention
Forget slapping it on.
Start by patting product on the surface of each section.
Then, rake it through with fingers , working from mid-lengths to roots.
For stubborn areas, add a touch of warm water with your hands—it helps spread product without tugging curls.
Step 6: Style Without Flattening
Put down the fine-tooth comb.
Use a wide-tooth comb , fingers , or even a Denman-style brush to guide your curls back. Follow your natural part or comb it straight back—whatever matches your look.
Slick doesn’t mean stiff. You still want your texture to show through.
Step 7: Set It and Don’t Touch
Want your look to last?
Once styled, wrap your hair with a satin scarf or bandana for 15–20 minutes. This locks everything down while the product sets—no flakes, no puff-up later.
Optional: Finish with a light clean ingredient mist of hairspray if you’re heading into heat, humidity, or an 8-hour shift.


